
Setting up a Footprint User
Footprint and Footprint Customer Portal use Microsoft Entra ID (formerly Azure Active Directory) to add to manage user access. Therefore, all users must have an Entra ID login either directly through their organization or via invitation. For setup instructions for Footprint Mobile Web, please see Setting up a Mobile User.
Datex Manager is where an organization manages its Footprint and Footprint Customer Portal users, once they've been added to Microsoft Entra ID. The following how-to will only cover adding new users to Footprint and Footprint Customer Portal. This tutorial assumes that at least one Role and Data Access Group have been created and configured. If a more detailed breakdown of setting up overall access is required, please see How to Setup Footprint User Access Control.
Prerequisites
 Add a user when the organization hosts their own Microsoft Entra ID
Before a user can be added to Datex Manager, the user must first be added to Microsoft Entra ID. If an organization is already using and managing Microsoft Entra ID internally these steps can be followed. This approach assumes that an organization is managing their Microsoft Entra ID adding employees themselves. If this is not the case, or the user being set up is an external user such as a Footprint Portal user, use the external invite approach.
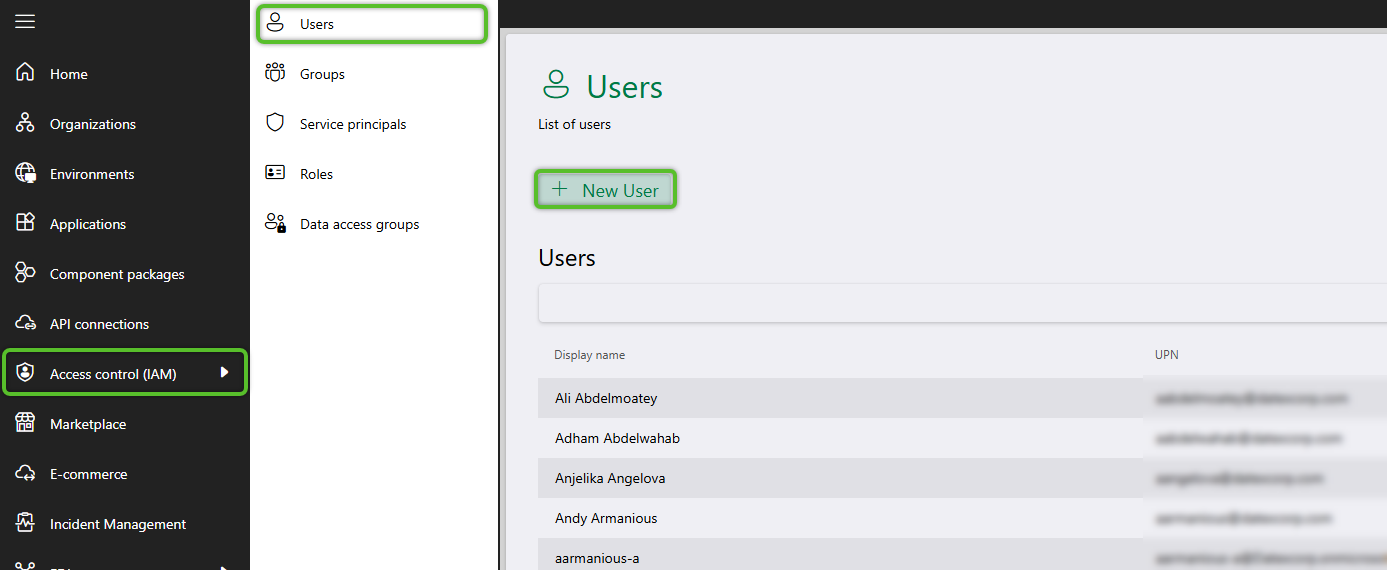
1. In Datex Manager, click Access control (IAM), then Users in the left navigation menu.
2. Click Manage users to open the drop down menu and select Manage Entra ID users.
This will open a window for managing users.
2. In the user management window, use the User search box above the Available users tab to find the new user you want to add.
Note
If the user can't be found in the list, they may either need to be added to an organization's own Microsoft Entra ID by their own internal IT support. If an organization is not managing their own Microsoft Entra ID, they will need to invite the user using the external user approach instead.
3. Once the user has been located, hover over the row then select the check box to the left of the Name, then click the + Add Users button.
The user will move from the Available users tab to the Added users tab.
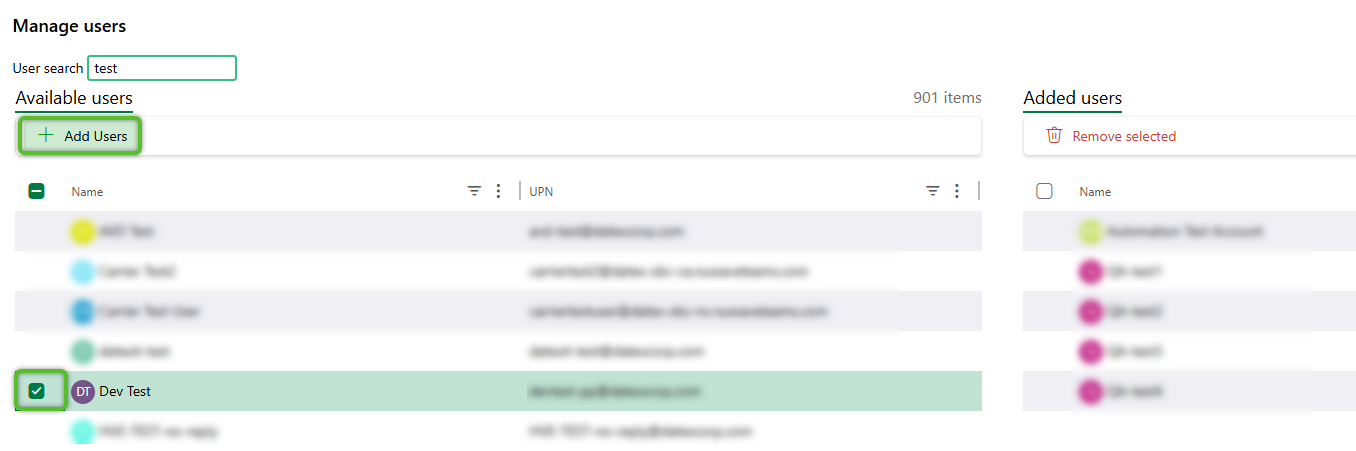
4. Click the Save changes button at the bottom right of the window to confirm the addition then close the window.
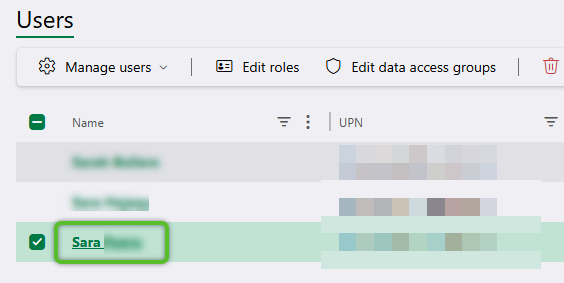
5. Back in the Users hub, locate the new user in the grid and click on their Name hyperlink. This will open a flyout to edit the user's information.
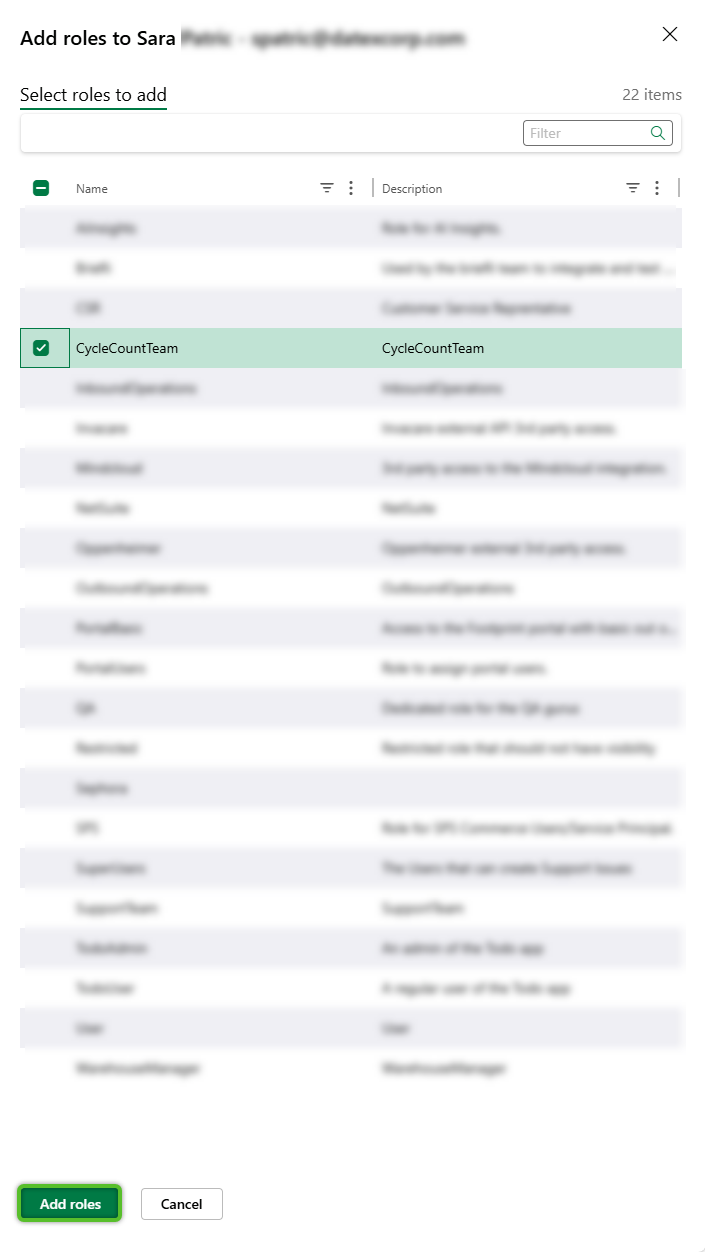
6. In the flyout, on the Roles tab, click the + Add roles button. This will open another flyout with a list of all available Roles.
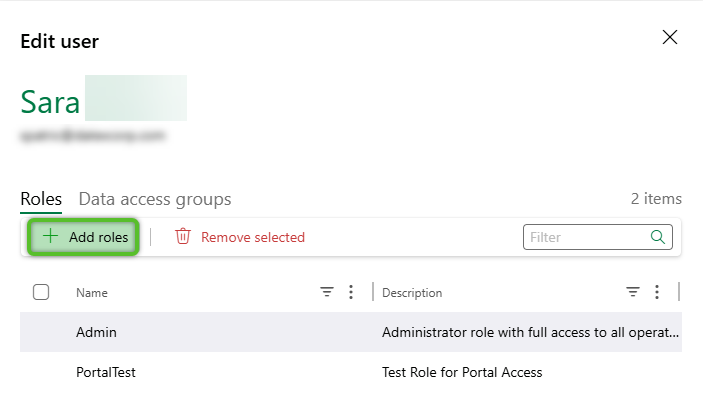
7. Check the Role or Roles to assign the user to, then click the Add roles button at the bottom to close the roles flyout and return to the user edit flyout.
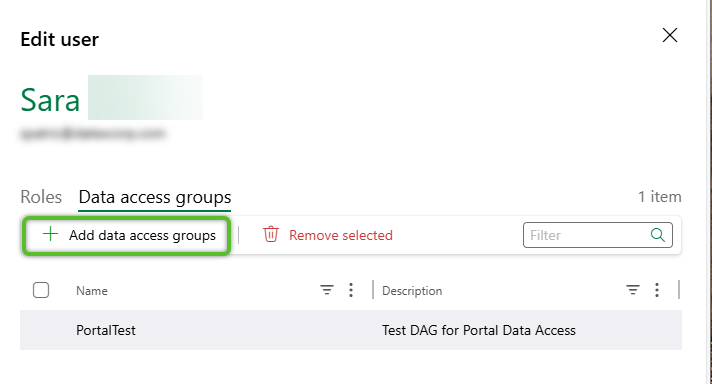
8. Click on the Data access groups tab, then click the + Data access groups button. This will open another flyout with a list of all available Data Access Groups.
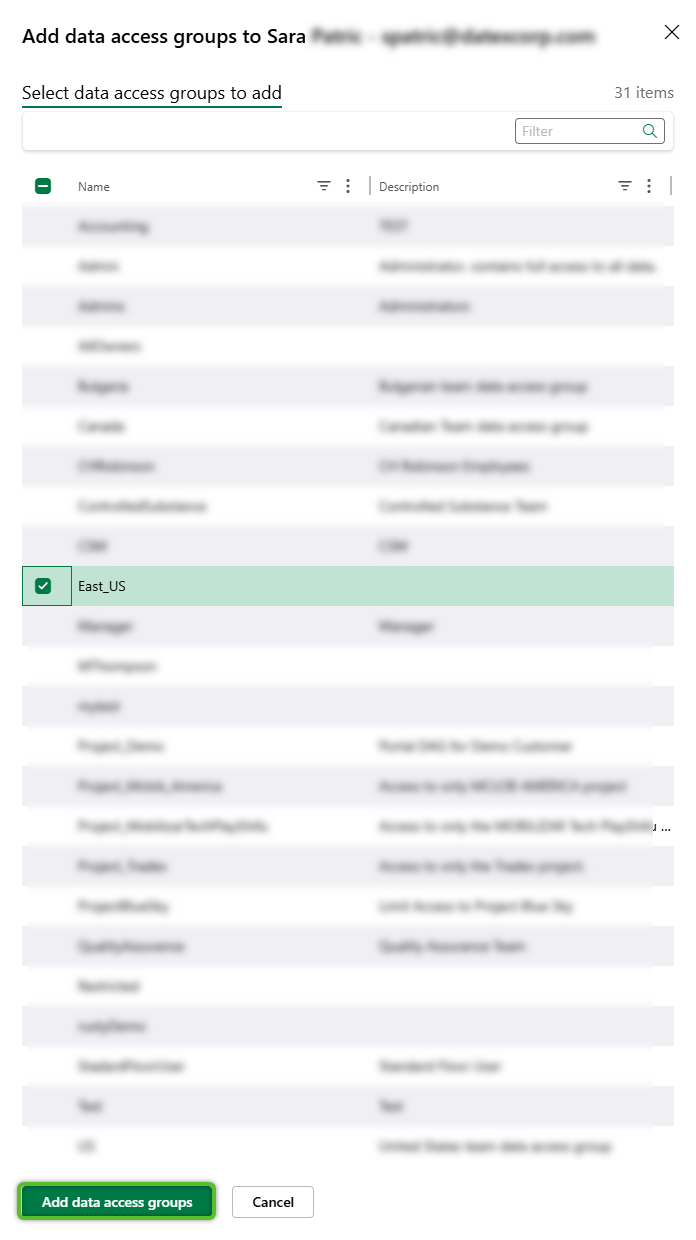
9. Check the Data Access Group or groups to assign the user to, then click the Add data access groups button at the bottom to close the Data Access Group flyout and return to the user edit flyout.
10. Click the Save button at the bottom of the flyout to apply the changes and return to the User hub.
11. Finally, locate the user in the User grid, and toggle on or off access to Datex Manager. If uncertain, keep in mind most users will not need access to Manager.

Note
If a user needs access to Datex Studio, in addition to Datex Manager as , you will need to get in touch with your Datex point of contact.
Add a user when Datex hosts the organization's Microsoft Entra ID
Before a user can be added to Datex Manager, the user must first be added to Microsoft Entra ID. If an organization is not managing their own Microsoft Entra ID, or setting up a user for the Footprint Portal, a new user will need to be invited into the tenant.
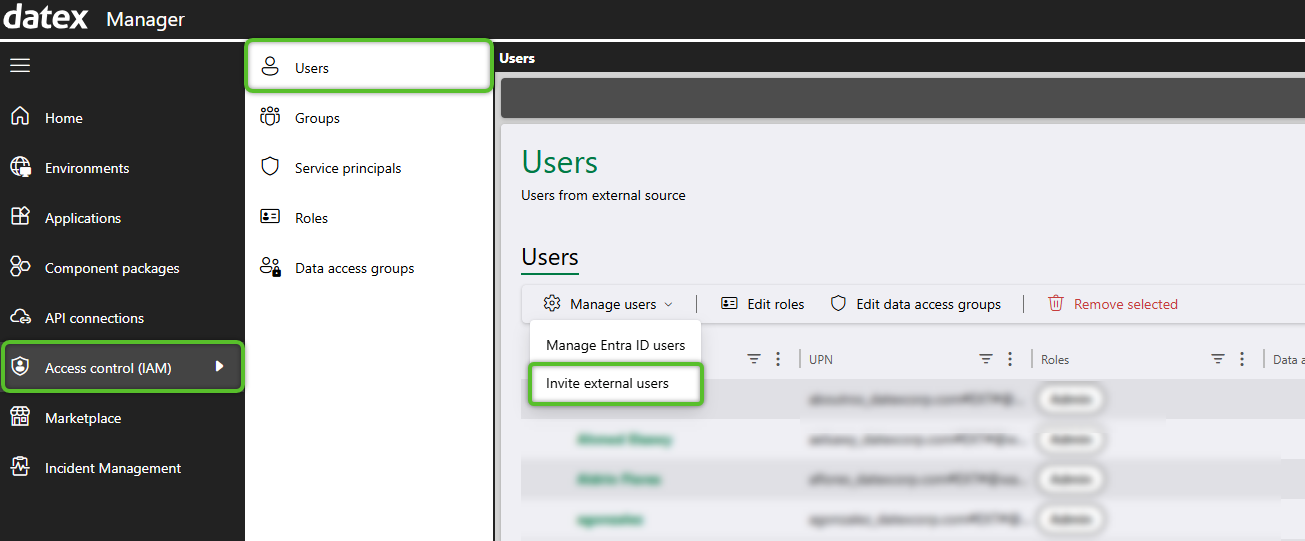
1. In Datex Manager, click Access control (IAM), then Users in the left navigation menu.
2. Click Manage users to open the drop down menu and select Invite external users.
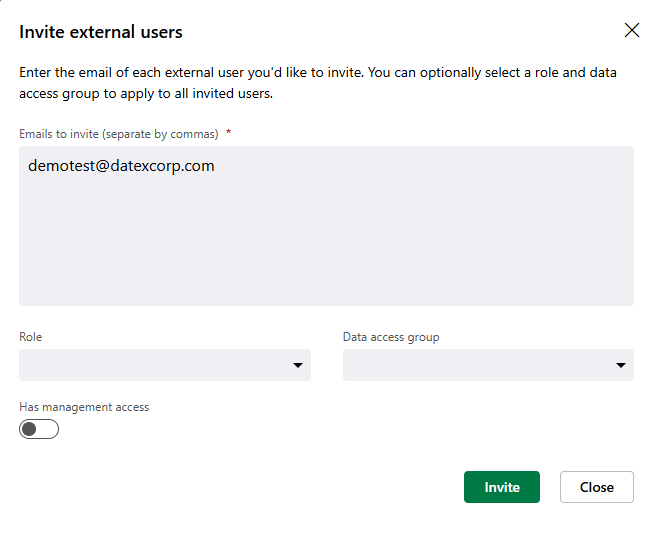
This will open a window for inviting external users.
Note
If a user needs access to Datex Studio in addition to Datex Manager, you will need to get in touch with your Datex point of contact.
2. In the invite window, enter the external users email address in the Emails to invite text box.
The Role and Data access group drop downs can be used to assign the invited user to a Role and/or Data Access Group right away. This is optional for the invite, however the user will need to be assigned at least a Role to be able to use Footprint and Footprint Portal.
Additionally, Has management access can be toggled on to give the invited user access to Datex Manager. Unless part of the invited user's job will require access to Datex Manager where user access can be controlled it is not recommended to give out access.
These selections can be updated later by following the same method outlined in steps 5 through 11 of the add an internal user setup.
3. Click the Invite button at the bottom right of the window to send the invite.
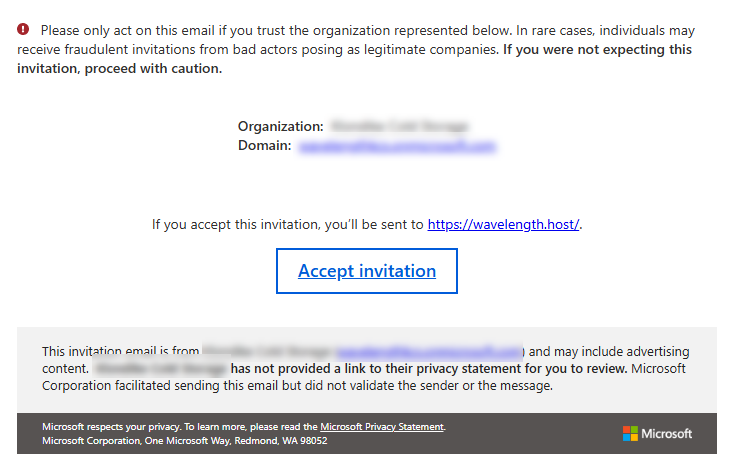
4. The recipient will receive an email similar to the included screenshot. They will need to follow the Accept invitation link and setup instructions that may include setting up two-factor authentication, depending on the organization.
| Last Updated: |
| 04/17/2026 |

Copyright © 2026 Datex Corporation